Withdrawal
Caution: Before disconnecting the fuel lines, clean the connectors and surrounding areas to prevent dirt from entering the system.
Series 1500
1. Remove the filler cap.
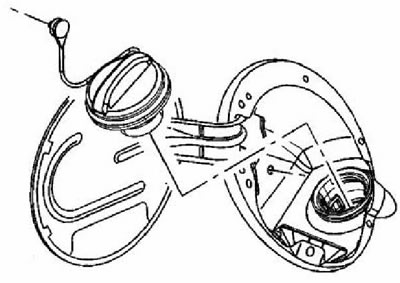
2. Remove the bolts (1) And (2) attaching the filler cap housing.
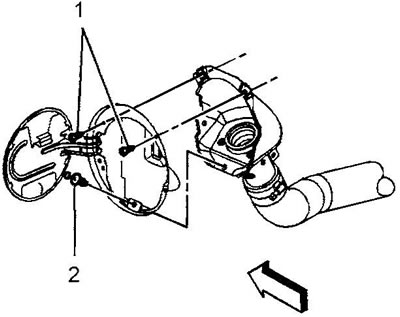
3. If necessary, remove the spare wheel lock cylinder.
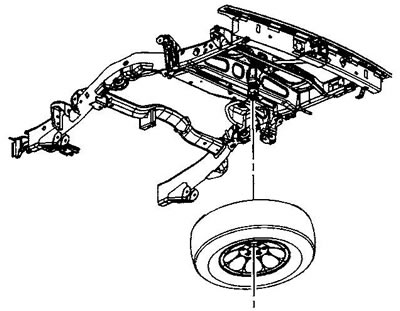
4. If necessary, remove the spare wheel.
5. Raise the car and move the safety stands under the frame.
6. Disconnect the clamp (1) securing the main gear vent hose from the filler pipe.
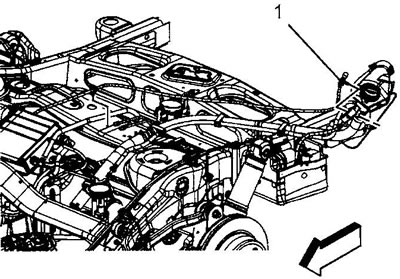
7. If necessary, disconnect the air suspension hose from the filler neck pipe.
8. Remove the ground screw (2) chassis wire harness.
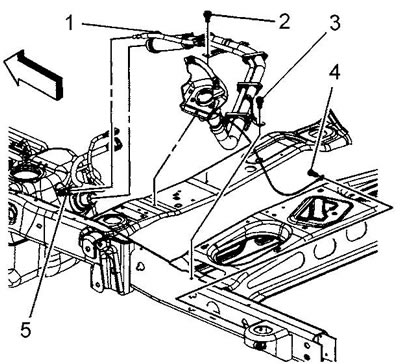
9. Remove the left tail light ground cables from the frame (4) and filler pipes (5).
10. Disconnect the connector from the filler pipe (5) fuel tank vent pipes.
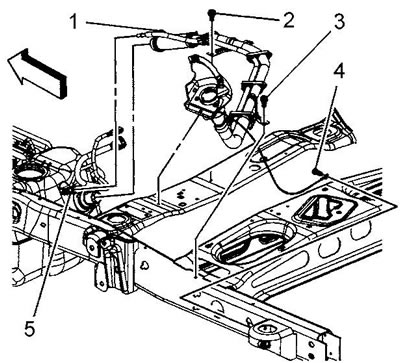
11. Loosen clamp (1) filler hose.
12. Turn away bolts (2) And (3) filler pipe bracket.
13. Disconnect the fuel filler hose from the fuel tank.
14. Plug open holes.
15. If necessary, disassemble the filler tube assembly.
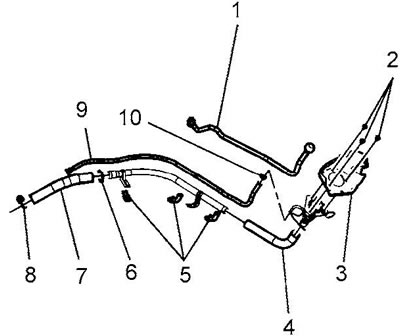
1 - filler vent hose, 2 - filler cap body bolts, 3 - filler cap body, 4 - filler hose, 5 - clips, 6 - clamp, 7 - hose, 8 - clamp, 9 - vapor recovery hose fuel, 10 - clamp
16. Installation is carried out in the reverse order.
Series 2500
1. Remove the rear fuel tank.
2. Loosen the ground screw (2) chassis wire harness.
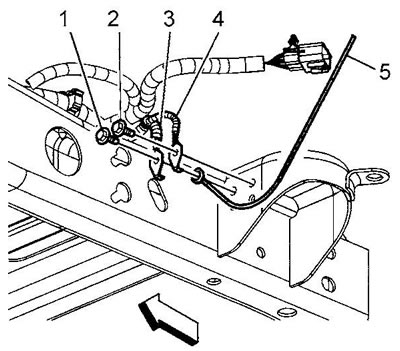
3. Remove the left tail light ground cables from the frame (4) and filler pipes (5).
4. Remove the main gear ventilation hose clamp from the filler pipe.
5. Loosen clamp (1) the front fuel tank filling hose.
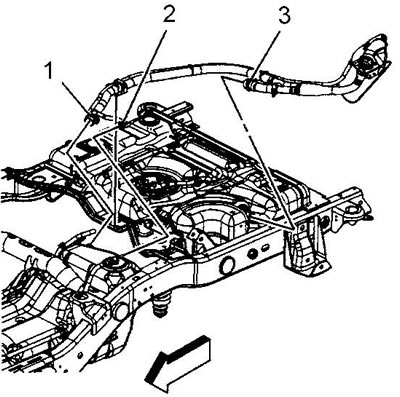
6. Disconnect the connector (2) evaporative emission hose.
7. Remove the front tank fill hose from the front tank.
8. Remove the integral clamp of the filler hose from the cross member.
9. Remove the hose and filler pipe assembly.
10. Plug open holes.
11. If necessary, disassemble the filler pipe assembly.
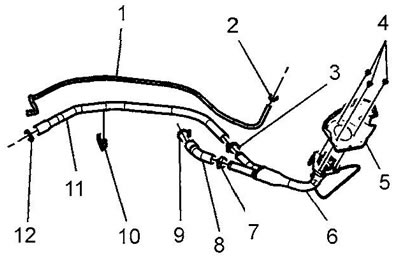
1 - fuel vapor accumulator hose, 2 - fuel vapor accumulator hose clamp, 3 - filler pipe clamp, 4 - filler cap body bolts, 5 - filler cap body, 6 - filler pipe stopper, 7 - filler pipe clamp, 8 - fuel tank ventilation hose, 9 - clamp, 10 - clip, 11 - filler pipe, 12 - clamp
Installation
12. Installation is carried out in the reverse order.
