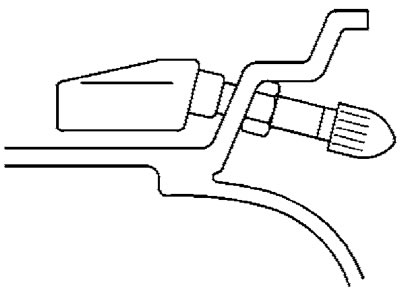
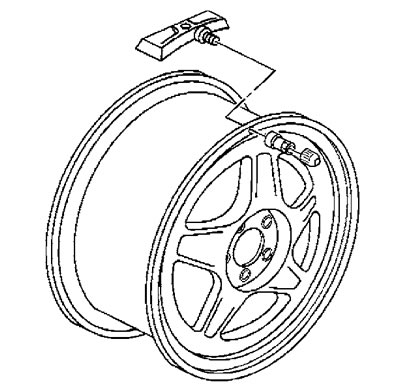
Withdrawal
1. Raise the vehicle and move it under the safety strut frame.
2. Remove the wheel.
3. Remove the tire from the wheel.
Attention: before removing the tire from the rim, read the recommendations for the safety of the sensor:
- After removal, place the cap and sensor nipple on a clean, dry surface. Cap and nipple are nickel plated to prevent corrosion. It is not allowed to install a cover or nipple having a different design.
- When tearing off the tire from the rim, set the pressure foot of the machine at a 90 degree arc from the nipple.
- Install the machine's flanging foot slightly clockwise from the sensor body. Rotate the wheel clockwise until the tire is completely off the rim.
- Remove the second tire bead in the same way.
- If sealant was used when installing the tire, clean the tire beads and the tire seat on the rim.
4. Turn away a nut of fastening of the gauge of pressure in the tire.

5. Remove the sensor.

Installation
1. Insert the sensor into the disc hole.
2. Screw on the sensor mounting nut and install the sensor housing parallel to the inner wall of the disc. Tighten the nut. Tightening torque 7 Nm.
3. Install the tire on the rim.
Attention: when installing a tire:
- Set the bevelling foot of the machine to 180 from the sensor.
- Set the bead transition to 45 clockwise from the nipple.
- Rotate the machine drum clockwise until the tire is seated on the rim.
- Install the second bead in the same way.
4. Install the wheel on the car.
5. Lower the car.
Attention: the new pressure sensor is delivered in a locked state, in which it is impossible to enter its code into the PDM memory. The transition of the sensor to the operating mode occurs when the vehicle is moving at a speed above 30 km/h for at least 10 seconds.
6. Enter the sensor code into the PDM unit's memory.
