Attention:
- Do not leave the caliper hanging on the brake hose as this will deform the hose and cause brake fluid to leak. Tie the caliper with wire.
- If the brake pads are to be reinstalled, mark the pad installation locations and orientation.
- If reinstallation of brake shoes is supposed, mark places of installation of adjusting linings.
- When replacing the brake pads, the shims must be replaced at the same time.
1. Check up liquid level in a tank of the main brake cylinder.
2. If the brake fluid level is in the middle between the maximum and minimum level marks, then it is not necessary to remove the fluid from the reservoir before starting to replace the pads.
3. If the brake fluid level is above the middle, pump out the fluid to the middle between the marks.
4. Raise the vehicle and place the safety struts under the frame.
5. Remove the front (or rear) wheel.
6. To facilitate the removal and correct subsequent installation of new pads, insert the brake caliper pistons into the caliper:
- install a large clamp on the caliper body and on the outer brake shoe.
- slowly move the jaws of the clamp until the pistons are fully seated in the caliper.
- remove the clamp.
Series 1500
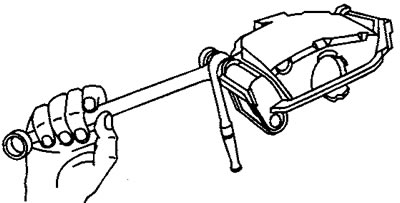
7. Turn away a bolt of a directing finger of a brake support.

Attention:
- When loosening and tightening the guide pin bolts, use only hand tools.
- When loosening and tightening the guide pin bolts, hold the guide pin with an open end wrench. Do not allow the key to contact the caliper.
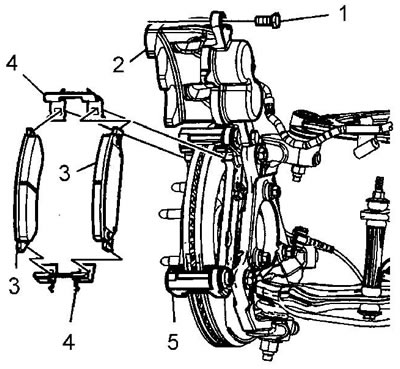
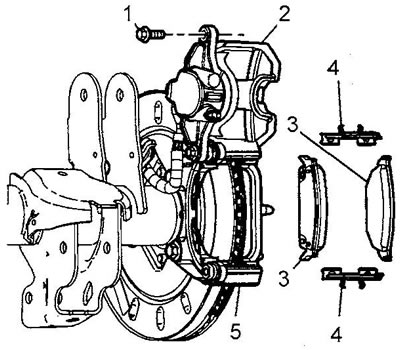
8. Remove the bolt (1) lower guide pin.

front brake
Tightening torque 100 Nm.

Rear brake
Tightening torque 38 Nm.
Note: Apply locking adhesive to the bolt threads before installing the bolt.
9. Rotate the brake caliper (2) up until it stops in the bracket and tie the caliper with wire. The brake hose does not need to be disconnected.
10. Remove the brake pads (3).
11. Remove shims (4) brake pads with support bracket (5). Do not reinstall shims and guide pin bolts on rear brakes.
12. Installation is carried out in the reverse order.
Series 2500
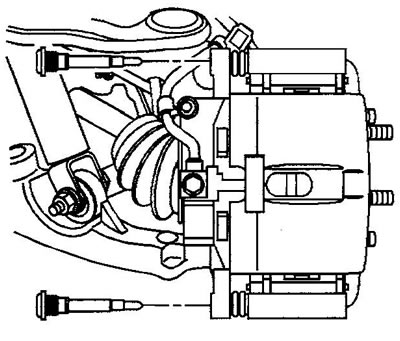
7. Turn away bolts of directing fingers of a brake support.

Front brake example
Tightening torque 108 Nm.
8. Remove the brake caliper, tie the caliper with wire behind the frame.
9. Remove the brake pads.
10. Note the orientation of the pad wear sensor.
11. Remove and discard shims. Do not reinstall gaskets.
12. Install in reverse order.
All models
13. After installation:
- A) Without starting the engine, slowly lower the brake pedal to approximately 2/3 full travel.
- b) Release the brake pedal slowly.
- V) Wait about 15 seconds and repeat the steps (A) And (b) 7-8 times before receiving "solid" pedals and brake pads.
- G) Adjust the brake fluid level in the master cylinder reservoir.
- d) Lap the pads to the discs, see below.
