Withdrawal
Cadillac Escalade (models before 2005)
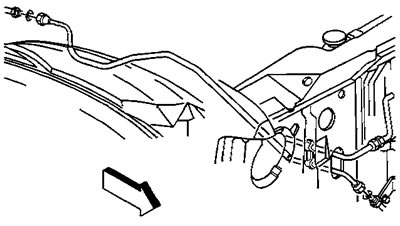
1. Pump out the coolant from the air conditioning system.
2. Remove the expansion tank of the engine cooling system. see chapter "Cooling system".
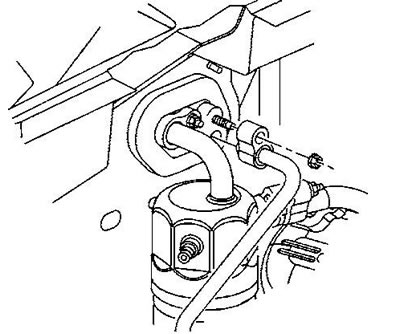
3. Turn away a nut of fastening of a tube of the evaporator to the evaporator. Tightening torque 20 Nm.

4. Remove and discard sealing washer.
5. Remove the grille. See chapter "Body".
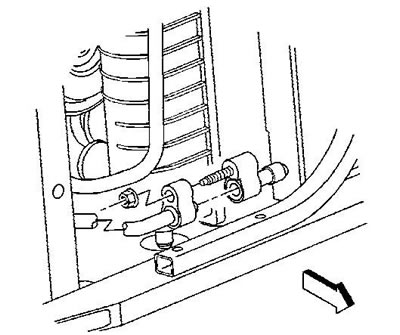
6. Turn away a nut of fastening of a tube of the evaporator to the condenser. Tightening torque 20 Nm.
7. Disconnect the evaporator tube from the condenser.
8. Remove and discard sealing washer.
9. Disconnect the clamps securing the tube and remove it.
10. Installation is carried out in the reverse order.
Note: When installing new sealing washers, they must be coated with compressor oil.
11. Evacuate the system and charge the system with refrigerant.
12. Using a special tool, check the connected fittings of the system for refrigerant leakage.
Chevrolet Tahoe, Cadillac Escalade (models since 2005)
1. Pump out the coolant from the air conditioning system.

2. (Cadillac Escalade, GMC Yukon, models since 2007) Remove the top radiator cap and deflector.
3. (Models since 2007) Remove the air filter.
4. (Models since 2007) Remove the expansion tank nut and bolt and move it to the side.
5. Turn away a nut of fastening of a tube of the evaporator to the evaporator. Tightening torque 16 Nm.
6. Disconnect the tube from the evaporator.
7. Turn away a nut of fastening of a tube of the evaporator to an additional tube (some models). Tightening torque 16 Nm.
8. Disconnect the tube from the additional tube (some models).

9. (Models up to 2007) Remove the turn signal bulb. See chapter "Body electrical equipment".
10. (Models up to 2007) Remove the grille. See chapter "Body".
11. Turn away a nut of fastening of a tube of the evaporator to the condenser. Tightening torque 16 Nm.
12. Disconnect the tube from the evaporator.
13. Remove the evaporator tube from the vehicle.
14. Remove and discard all o-rings.
Installation
15. Installation is made in an order, the return to removal.
16. Evacuate the system and charge the system with refrigerant.
17. Using a special tool, check the connected fittings of the system for refrigerant leakage.
