Withdrawal
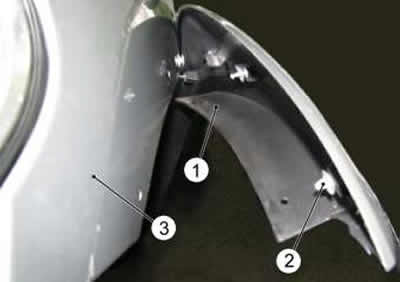
Remove five screws 1 (pic. 8-118) cladding fixings 2.

Pic. 8-118. Cladding installation:
1 - screw;
2 - lining of the front wheel arch.
Remove trim 1 (pic. 8-119), overcoming the resistance of holders 2.

Pic. 8-119. Facing of an arch of a forward wheel:
1 - lining;
2 - holder;
3 - front wing.
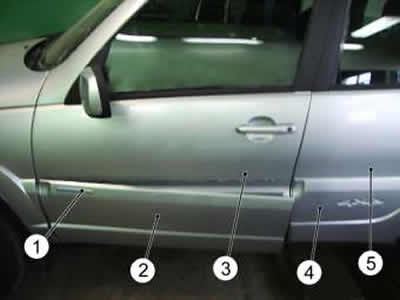
Remove trim 1 (pic. 8-120), overcoming the resistance of the lining clamps.

Pic. 8-120. Front and rear door trims:
1 - front door trim;
2 - lining of the front door;
3 - front door;
4 - lining of the rear door;
5 - back door.
Squeeze out the edge of the trim 2 with a trim remover and cut off the double-sided adhesive tape along the top of the trim with a knife.
Remove facing 2, overcoming resistance of plastic holders.
Squeeze out the edge of the lining 4 with a decorative trim remover and cut off the double-sided adhesive tape along the upper part of the lining with a knife.
Remove facing 4, overcoming resistance of plastic holders.
Remove adhesive tape residue from front and rear doors and trims with a 3M GR-DC adhesive stripping disc.
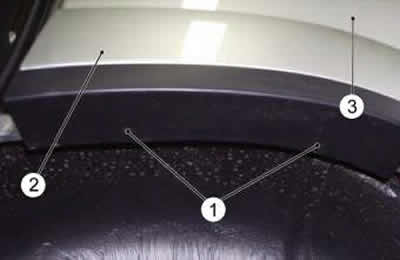
Remove two screws 1 (pic. 8-121) mounting lining 2 arches of the rear wing.

Pic. 8-121. Facing of an arch of a back wheel:
1 - screw;
2 - lining of the rear wheel arch;
3 - rear wing.
Remove facing 2, overcoming resistance of plastic holders.
Installation
Install new plastic holders on the facings.
Degrease the mating surfaces of the facings with the body with white spirit.
Apply double-sided adhesive tape to the top edge of the trims and install the trims in the reverse order of removal.
