Necessary equipment
DW110-060 Engine Mount Assembly
Withdrawal procedure
1. Remove the battery and battery tray. See Section 1E1, Engine Electrical System - 2.0 Diesel; Section 1E2, Engine Electrical System - FAM II 2.4D; Section 1E3, Engine Electrical System - HFV6 3.2L.
2. Remove power steering oil reservoir retaining bolts and set reservoir aside.
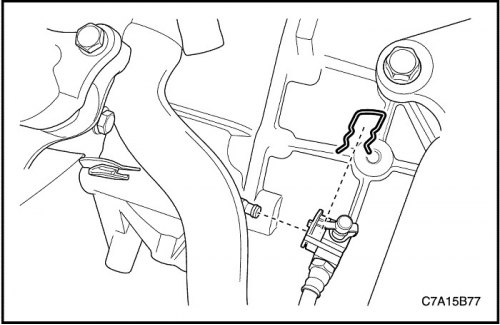
3. Remove the pin and remove the clutch cylinder tube.
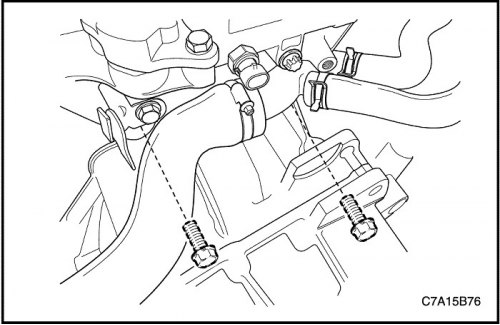
4. Remove the upper bolts securing the gearbox to the engine.
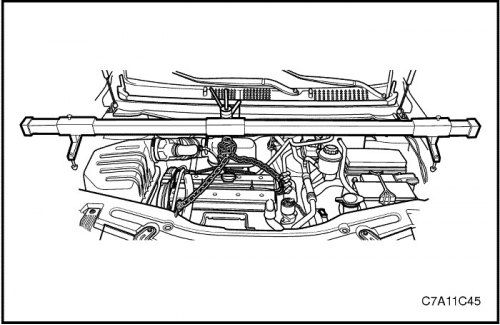
5. Install DW110-060.
6. Raise the vehicle and place it on the supports provided for this purpose.
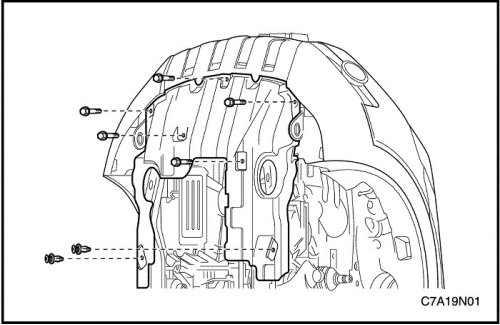
7. Remove the engine crankcase protection. See «Section 9N, frame and underbody».
8. Remove the left dust cover.
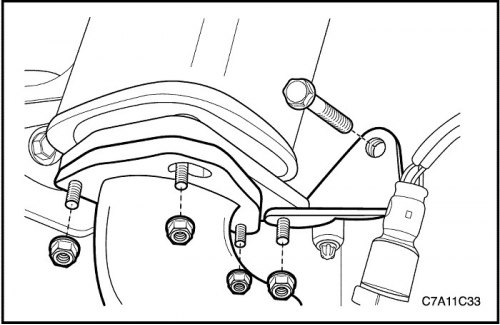
9. Remove the exhaust pipe from the muffler. See Section 1G1, Engine Exhaust System - 2.0 Diesel; Section 1G2, Engine exhaust system - FAM II 2.4D; Section 1G3, Engine exhaust system - HFV6 3.2L.
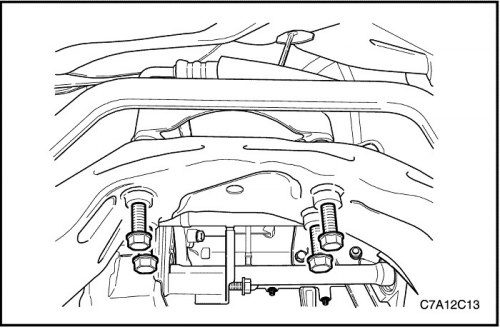
10. Carefully remove the frame from the car. See Section 2C, "Front suspension".
11. Remove drive axles. See section 3A, "Front drive axle".
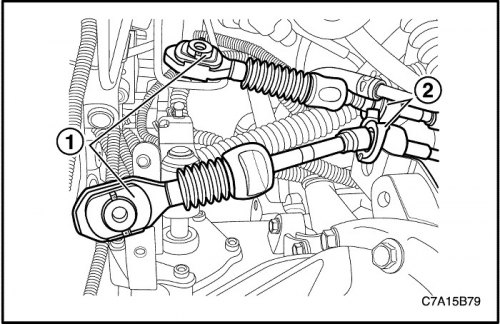
12. Remove shift control cables (1) from the transaxle assembly using a suitable tool.
13. Remove cables (2) from the shift control cable bracket.
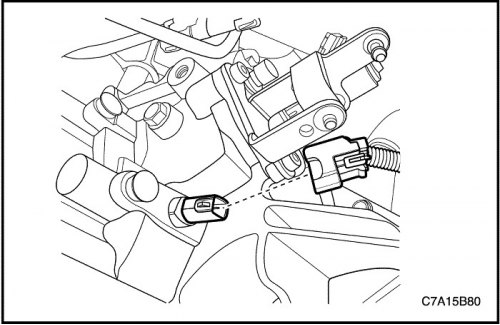
14. Disconnect the reverse light switch electrical connector.
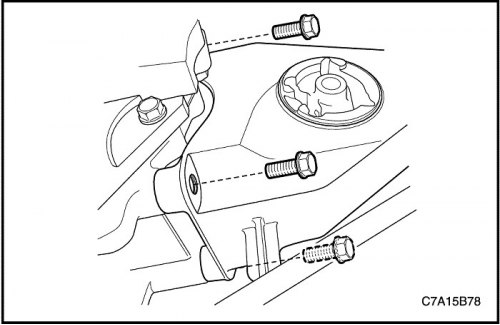
15. Loosen the front damper bushing mounting bolts and remove the front damper bushing.
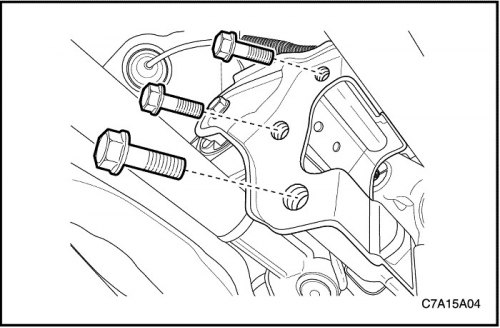
16. Remove the bolts securing the rear gearbox suspension bracket.
17. Remove the rear damper bushing and rear transaxle mounting bracket assembly.
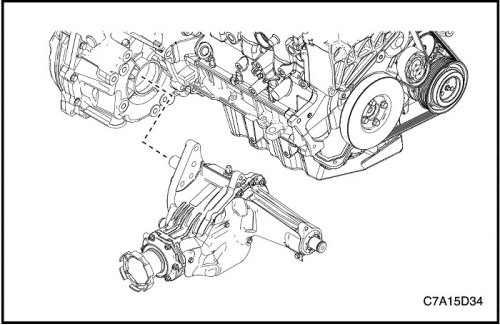
18. For AWD, remove the transfer case from the transaxle assembly. See Section 5D, Transfer case.
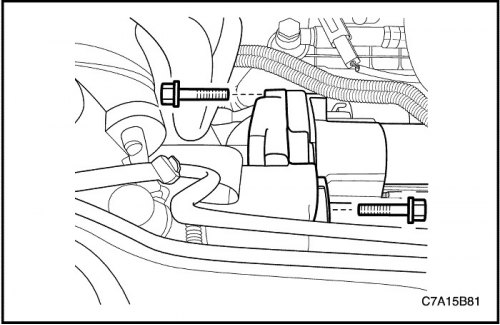
19. Remove starter. See Section 1E1, Engine Electrical System - 2.0 Diesel; Section 1E2, Engine Electrical System - FAM II 2.4D; Section 1E3, Engine Electrical System - HFV6 3.2L.
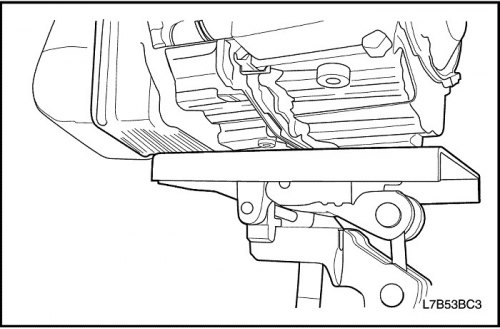
20. Support the gearbox with final drive assembly on a jack.
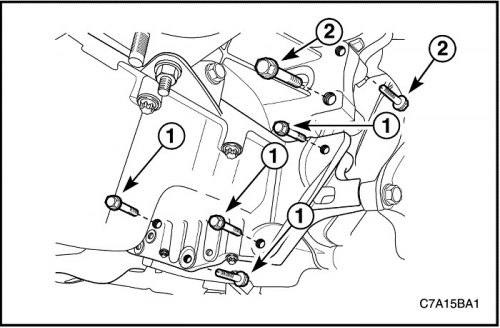
21. Remove bolts (1) attaching the oil pan flange to the transaxle assembly.
22. Remove the right lower bolts securing the engine to the transaxle assembly near the front damper bushing (2).
Note: For bolt removal on HFV6 3.2L or 2.0S Diesel, see Section 1B, Engine Mechanical - 2.0 Diesel; Section 1C2, Engine Mechanical - HFV6 3.2L.
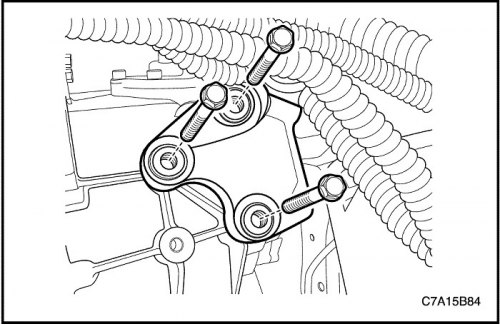
23. Loosen the bolts securing the left upper transaxle suspension bracket assembly.
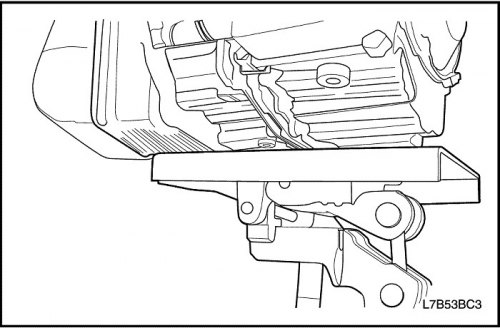
24. Carefully remove the transaxle assembly from the vehicle.
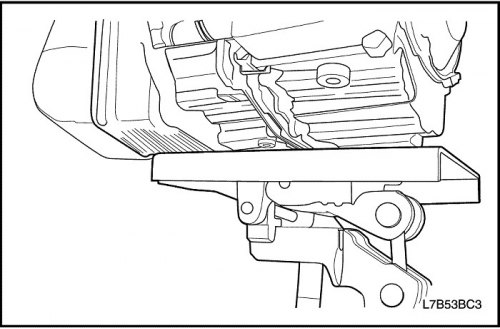
Installation order
1. Install the transaxle assembly to the vehicle and support the transaxle assembly on a jack.
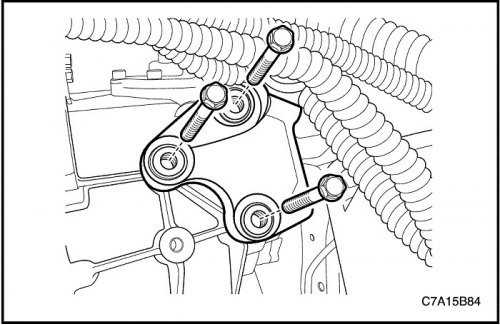
2. Install the left upper transaxle mounting bracket bolts.
Tighten
Tighten the mounting bolts of the left upper bracket of the gearbox with final drive assembly to 50 Nm (37 lb-ft).
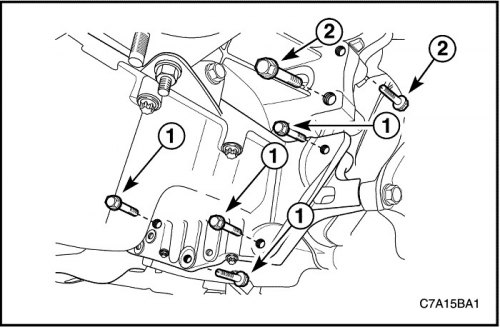
3. Install right bottom bolts (2) mounting the engine to the gearbox with final drive assembly near the front damper bushing.
Tighten
Tighten the right bottom bolts (2) fastening the engine to the gearbox with final drive assembly torque 75 Nm (55 lb-ft).
4. Install bolts (1) attaching the oil pan flange to the transaxle assembly.
Tighten
Tighten the bolts (1) fixing the oil pan flange to the gearbox with final drive assembly with a torque of 50 Nm (37 lb-ft).
Note: For installation and bolt torque on HFV6 3.2L or 2.0S Diesel, see Section 1B, Engine Mechanical - 2.0 Diesel; Section 1C2, Engine Mechanical - HFV6 3.2L.
5. Remove the jack supporting the transaxle assembly.
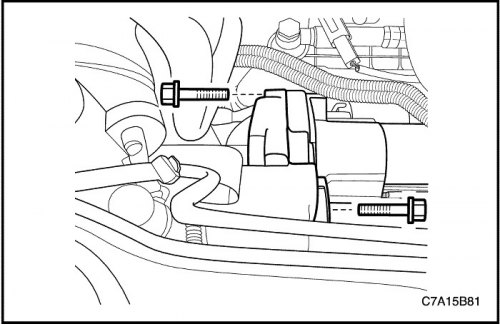
6. Install starter. See Section 1E1, Engine Electrical System - 2.0 Diesel; Section 1E2, Engine Electrical System - FAM II 2.4D; Section 1E3, Engine Electrical System - HFV6 3.2L.
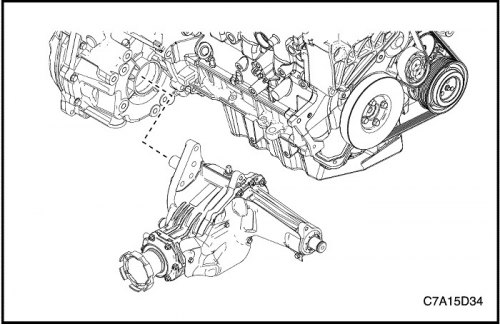
7. For AWD, install the transfer case to the transaxle assembly. See Section 5D, Transfer case.
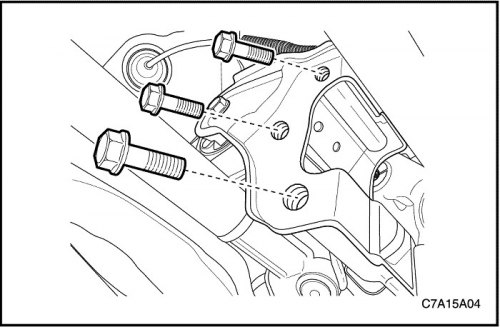
8. Install the rear damper bushing and transaxle rear mounting bracket assembly.
9. Install the rear transaxle mounting bracket bolts.
Tighten
Tighten the rear mounting bracket bolts of the gearbox with final drive assembly to 90 Nm (66 lb-ft).
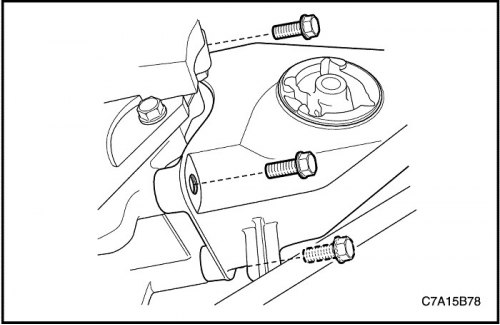
10. Install the front damper bushing and the front damper bushing suspension bolts.
Tighten
Tighten the front damper bush suspension bolts to 50 Nm (37 lb-ft).
11. Install drive axles. See section 3A, "Front drive axle".
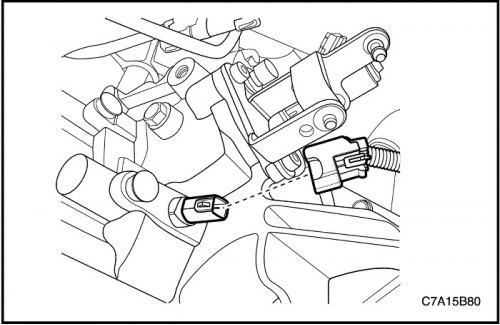
12. Connect the reverse lamp switch electrical connector.
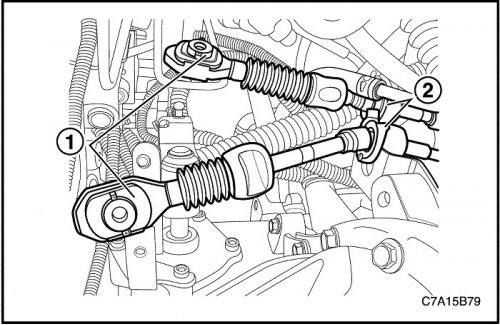
13. Install cables (2) into the shift cable bracket.
14. Install shift control cables (1) into the gearbox with final drive assembly.
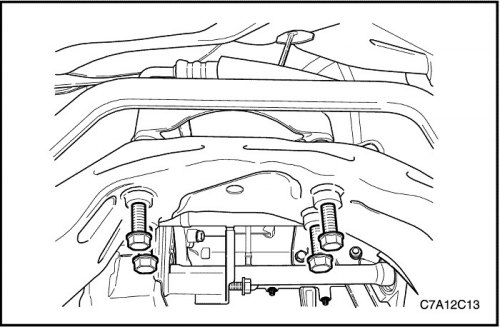
15. Carefully install the frame on the car. See Section 2C, "Front suspension".
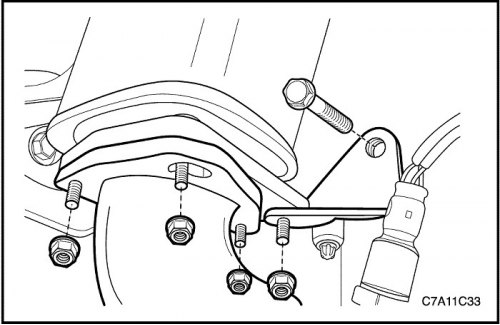
16. Install the muffler exhaust pipe. See Section 1G1, Engine Exhaust System - 2.0 Diesel; Section 1G2, Engine exhaust system - FAM II 2.4D; Section 1G3, Engine exhaust system - HFV6 3.2L.
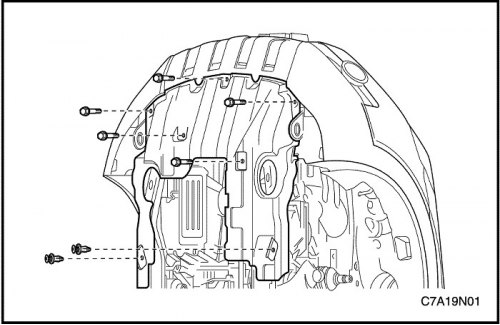
17. Install the left dust cover.
18. Install the engine crankcase protection. See «Section 9N, frame and underbody».
19. Lower the car.
20. Remove DW110-060 from engine.
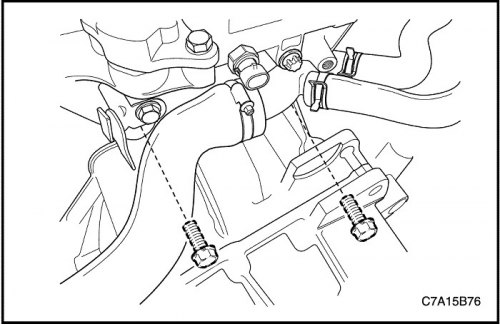
21. Install the upper gearbox-to-engine bolts.
Tighten
- In the case of FAM II 2.4D or 2.0S Diesel, tighten the upper transaxle-to-engine bolts to 75 Nm (55 lb-ft).
- In the case of HFV6 3.2L, tighten the upper transaxle-to-engine bolts to 50 Nm (37 lb-ft).
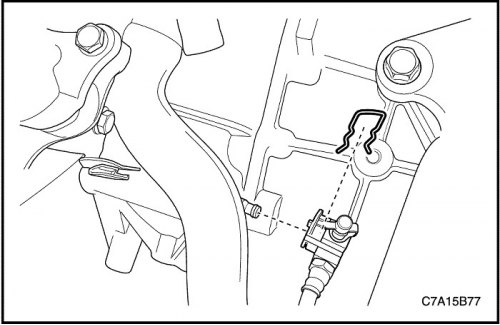
22. Install the clutch cylinder stud and tube.
23. Install the power steering oil reservoir hanger.
24. Install the battery and battery tray. See Section 1E1, Engine Electrical System - 2.0 Diesel; Section 1E2, Engine Electrical System - FAM II 2.4D; Section 1E3, Engine Electrical System - HFV6 3.2L.
25. Remove air from the hydraulic drive system. See Section 5C, "Clutch".
26. Adjust shift control cable. See «Shift cable adjustment» in this section.
27. Check fluid level. See «Transaxle Fluid Check Procedure» in this section.
