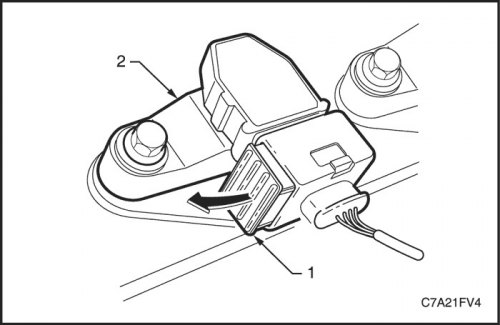
Removal procedure
1. Disconnect the negative battery cable.
2. Relieve pressure in the fuel supply system. See «Relieving pressure in the fuel supply system» in this section.
3. Remove the upper intake manifold assembly. See Part 1C2, "The mechanical part of the engine is HFV6 3.2L.
4. Disconnect the fuel line from the fuel rail.
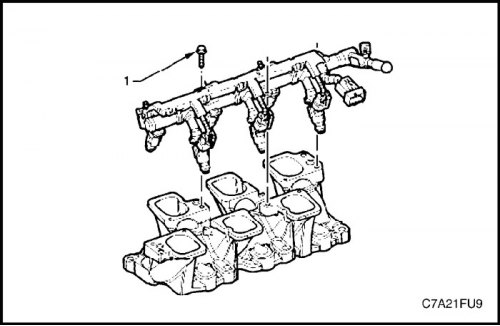
Attention! Clean around the area where the fuel injectors enter the lower intake manifold.
5. Remove screw (1), three positions, securing the fuel rail to the lower intake manifold.
Attention! Care must be taken not to damage the spray tips of the injectors and the wiring harness connector pins when removing the fuel rail and injector assembly. After removal, it is necessary to lay the fuel rail with injectors as an assembly on the support.
6. Slide the latch (1) fuel injector wiring connector up in the direction of the arrow.
7. Disconnect the connector from the fuel injector.
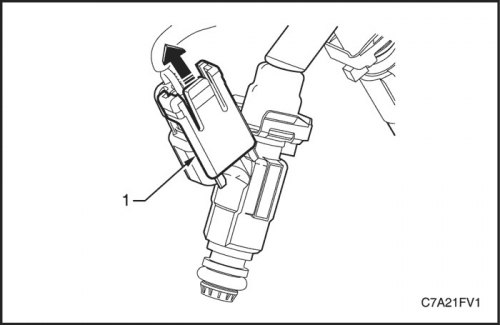
8. Slide the latch (1) fuel injector wiring connector up in the direction of the arrow.
9. Disconnect the connector from the fuel injector.
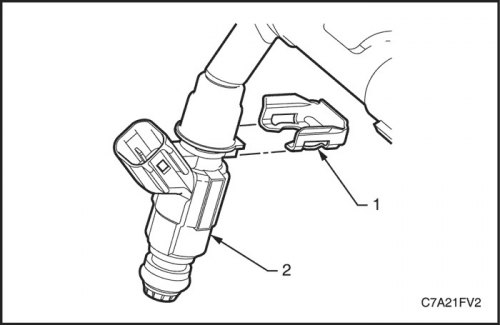
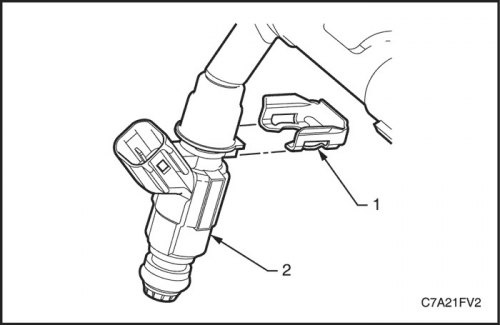
10. Remove the bracket with a flat blade screwdriver (1) fuel injector with fuel injector (2). Discard the mounting bracket.
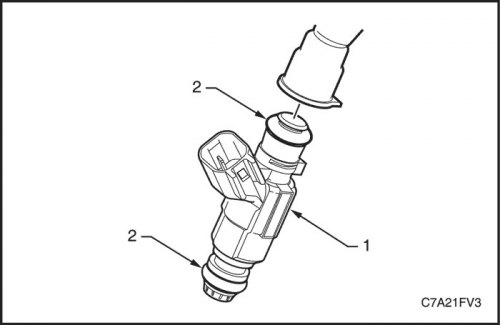
11. Remove fuel injector (1) from the fuel rail.
12. Remove and discard fuel injector seals (2).
Installation procedure
1. Install new fuel injector seals and lubricate with clean engine oil.
2. Install fuel injector (2) to the fuel rail.
3. Install new mounting bracket (1) fuel injector.
4. Connect the fuel injector connector.
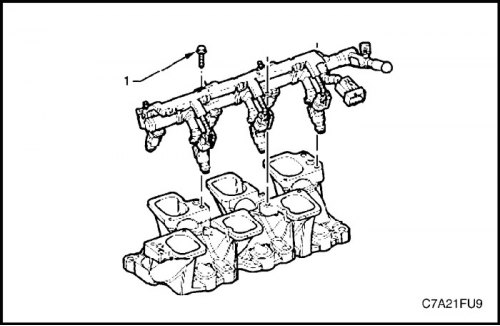
5. Carefully install the fuel rail assembly with injectors.
Attention! Before tightening the mounting screws, ensure that the fuel injectors are correctly inserted into the lower intake manifold and that the fuel rail mounting brackets are correctly positioned.
6. Install screws (1) fuel rail assembly.
Tighten
Tighten the mounting screws of the fuel rail assembly to 10 Nm (89 lb-in).
7. Connect the fuel feed line hose to the fuel rail.
8. Check fuel rail and quick coupling for leaks.
