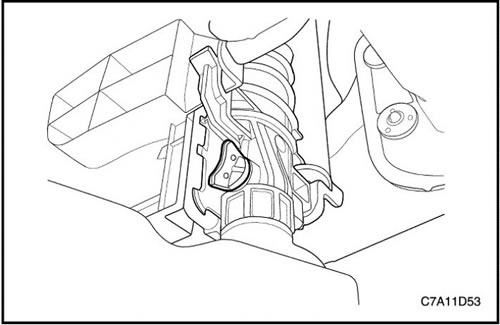
Removal procedure
1. Disconnect the negative battery cable.
2. Remove the decorative cover. See Section 1B, "Engine mechanical system - 2.0 Diesel".
3. Remove hoses and air ducts of system of forced air. See Section 1B, "Engine mechanical system - 2.0 Diesel".
4. Remove the bottom engine cover. Follow Section 9N, Frame and lower bodywork.
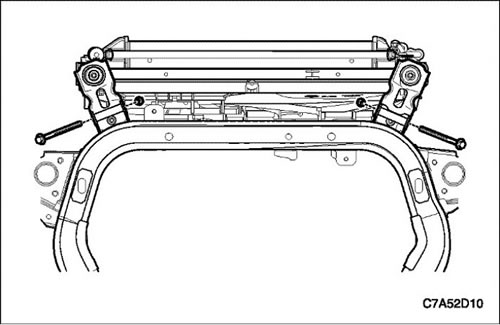
5. Pull the heatsink assembly up to the top bracket with straps to keep it from falling.
6. Remove the lower radiator bracket from the frame.
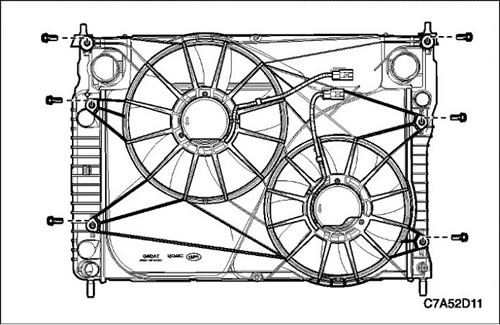
7. Disconnect the electrical connectors for both cooling fans.
8. Remove the cooling fan shroud mounting screws.
9. Remove the cooling fan assembly down.
10. Remove both main and auxiliary fan blades from the fan shroud by unscrewing the nut in the center of the fan hubs.
11. Remove both fan motor retaining screws.
12. Remove both fan motors from the shroud.
Installation procedure
Attention! If the fan structure is bent or damaged in any way, do not attempt to repair or reuse the damaged part. A bent or damaged fan must be replaced with a new one. It is very important to maintain the proper balance of the fan assembly. A fan that is not properly balanced may break or fly apart during operation, creating an extreme hazard. A broken or bent fan assembly cannot be properly balanced.
1. Install both fan motors in the casing.
2. Fasten the motor to the casing with locking screws.
Tighten
Tighten the fan motor fixing screws to 3.5 Nm (31 lb-in).
3. Install the fan blades to the shroud using the nuts on the fan hub.
Tighten
Tighten the fan blade lock nuts to 5.6 Nm (50 lb-in).
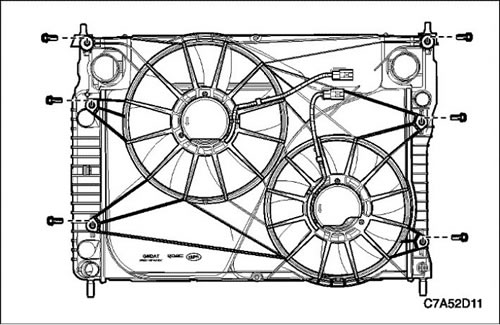
4. Install the assembled cooling fan to the radiator.
Tighten
Tighten the cooling fan assembly bolts to 4 Nm (35 lb-in).
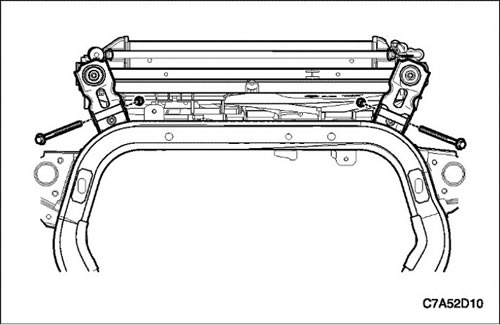
5. Install the lower radiator bracket to the frame.
Tighten
Tighten the radiator bottom bracket bolts to 50 Nm (39.6 lb-ft).
