Power steering pump removal procedure
1. Drain the fluid from the power steering reservoir.
2. Remove the front wheels. See section 2E, "Tires and wheels".
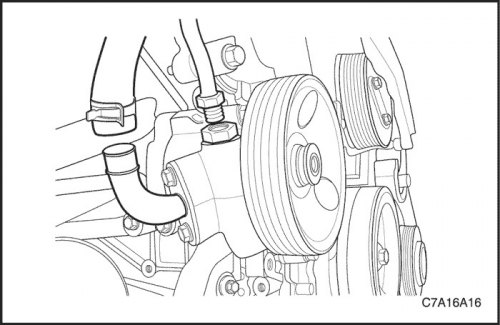
3. Disconnect the high pressure pipe and supply hose from the inlet and outlet fittings of the power steering pump.
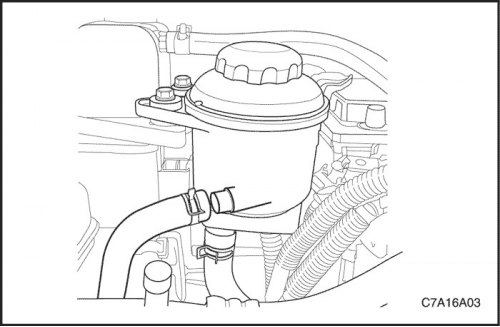
4. Remove the fluid reservoir screws.
5. Disconnect the return tube from the fluid reservoir.
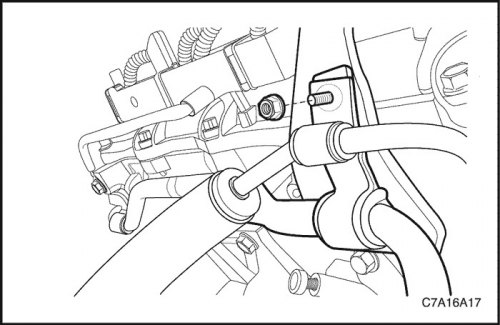
6. Loosen the high pressure pipe bracket mounting bolt near the rear of the cylinder head.
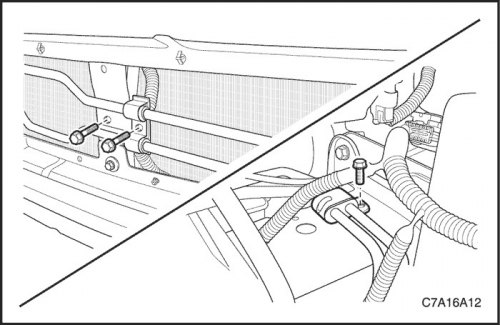
7. Remove facing of a forward bumper. See section 9O, "Bumpers and facings".
8. Loosen the mounting bolts of the cooling return pipe bracket in front of the grille.
9. Loosen the retaining bolt for the cooling return tube bracket bracket under the left headlight.
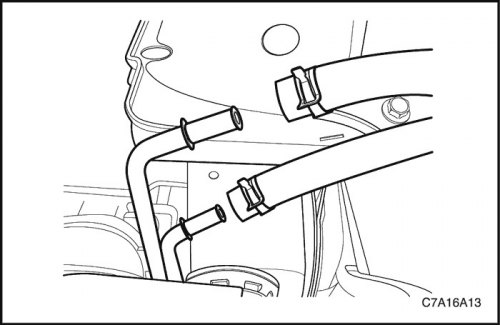
10. Disconnect the cooling return hoses from the pipes near the lower left side of the front bumper.
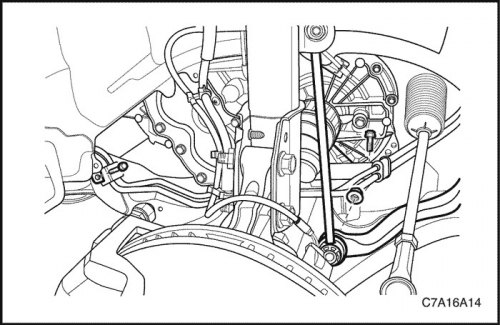
11. Remove the left front engine cover. See section 9R, "Front body".
12. Loosen the mounting bolts of the cooling return tube bracket bracket near the frame.
13. Remove the nut from the stabilizer bar and lift the stabilizer bar back.
14. Remove the front left drive shaft. See section 3A, "Front drive axle".
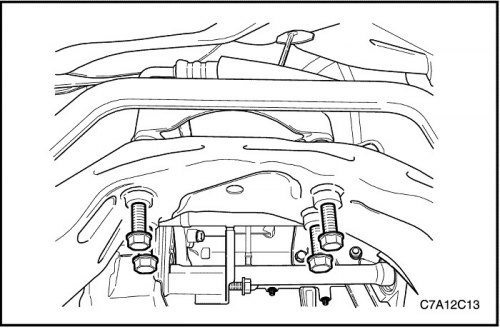
15. Remove the front exhaust pipe. See Section 1G3. Engine exhaust system - HFV6 3.2 L.
16. Remove the transaxle rear mount assembly. See section 1C2, "Engine mechanical system - HFV6 3.2L".
17. For all-wheel drive, remove the transfer case. Section 5D "Transfer case»
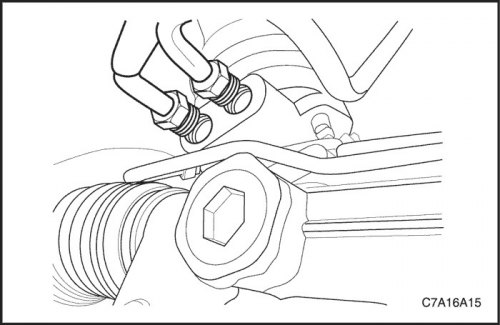
18. Disconnect the high pressure hose from the power steering inlet fitting.
19. Disconnect the return line from the power steering outlet.
20. Remove the return pipe and high pressure pipe from the vehicle.
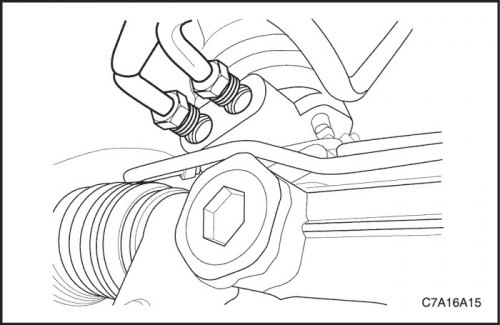
Installation order
1. Route the high pressure pipe from the power steering pump to the power steering gear.
2. Route the return pipe from the fluid reservoir to the power steering gear.
3. Raise the vehicle and place it on the supports provided for this purpose.
4. Connect the return pipe to the power steering outlet.
Tighten
Tighten the return tube fitting to 28 Nm (21 lb-ft).
5. Connect the high pressure hose to the power steering inlet fitting.
Tighten
Tighten the high pressure tube fitting to 28 Nm (21 lb-ft).
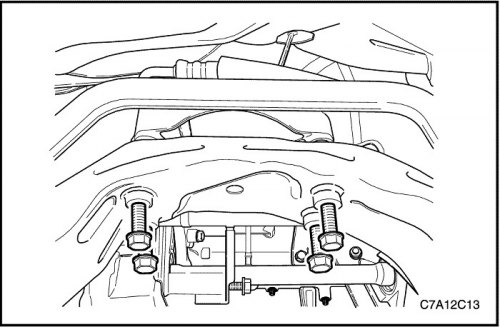
6. For all-wheel drive, install a transfer case. See Section 5D "Transfer case»
7. Install the transaxle rear mount assembly. See section 1C2, "Engine mechanical system - HFV6 3.2L".
8. Install the front exhaust pipe. See Section 1G3. Engine exhaust system - HFV6 3.2 L.
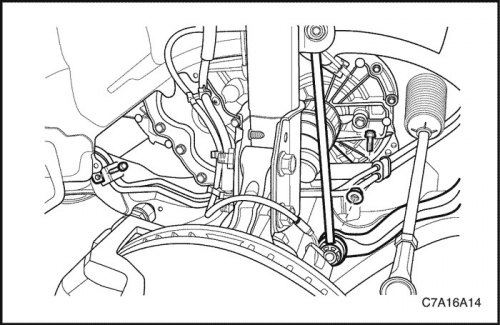
9. Install the front left drive shaft. See section 3A, "Front drive axle".
10. Install the stabilizer bar with the nut.
Tighten
Tighten the nut securing the stabilizer bar to the stabilizer link with a torque of 65 Nm (48 lb-ft).
11. Install the cooling return tube bracket bracket mounting bolts near the frame.
Tighten
Tighten the fixing bolts of the return tube with a torque of 10•m (7lb-ft).
12. Install the left front engine cover. See section 9R, "Front body".
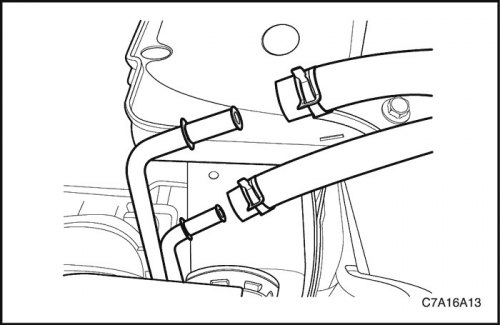
13. Connect the cooling return hoses to the pipes near the lower left side of the front bumper.
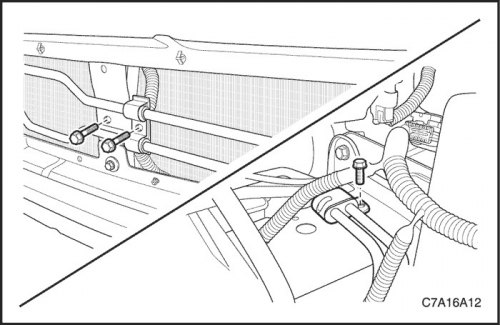
14. Install the cooling return pipe bracket bracket mounting bolt under the left headlight and in front of the grille.
Tighten
Tighten the fixing bolts of the return tube with a torque of 10•m (7lb-ft).
15. Install the front bumper trim. See section 9O, "Bumpers and cladding".
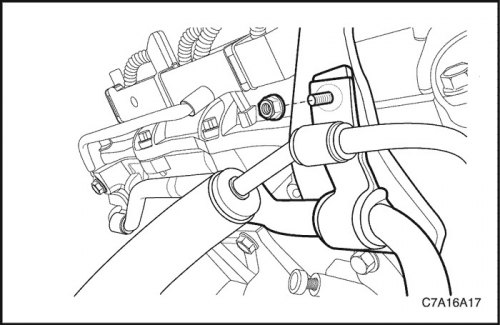
16. Install the high pressure pipe bracket mounting bolt near the rear of the cylinder head.
Tighten
Tighten the fastening bolts of the high pressure tube with a torque of 10•m (7lb-ft).
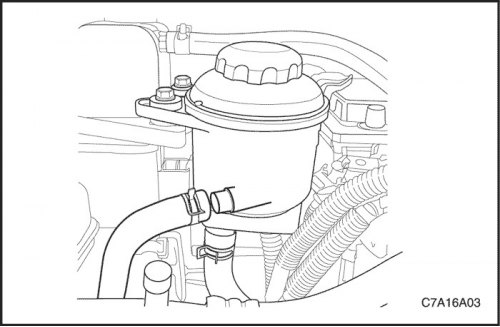
17. Connect the return tube to the fluid reservoir.
18. Install the fluid reservoir with bolts.
Tighten
Tighten the fluid reservoir bolts to 9 Nm (80 lb-in).
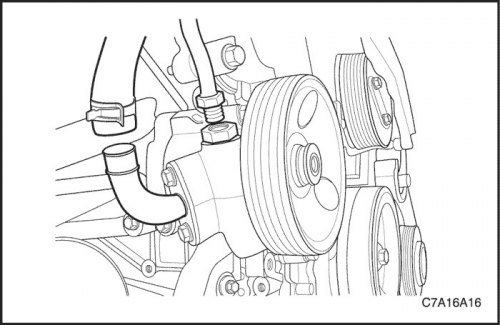
19. Connect the high pressure pipe and supply hose to the inlet and outlet fittings of the power steering pump.
Tighten
Tighten the high pressure tube fitting to 28 Nm (21 lb-ft).
Note: Always use DEXRON®-IID Power Steering Fluid for topping up or complete fluid changes. The use of an unsuitable fluid will damage hoses and seals and result in leakage.
20. Install the front wheels. See section 2E, "Tires and wheels".
21. Fill reservoir with power steering fluid.
22. Make sure there is no leakage. If a leak is found, correct its cause and bleed the system. See «Bleeding the power steering system» in this section.
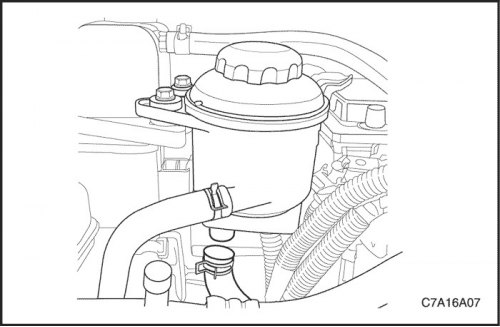
Power steering supply hose removal procedure
1. Drain the fluid from the power steering reservoir.
2. Remove the fluid reservoir screws.
3. Disconnect the supply hose from the lower fitting of the fluid reservoir.
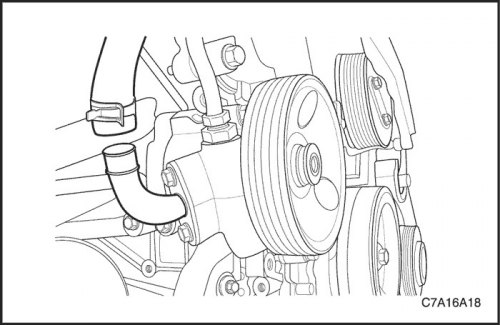
4. Remove the front wheels. See section 2E, "Tires and wheels".
5. Disconnect the supply hose from the power steering pump inlet fitting. Use a rag to prevent liquid from spilling.
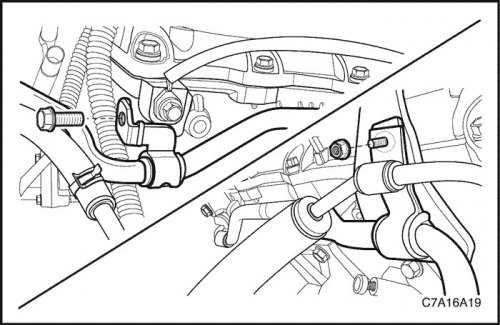
6. Unscrew the fixing bolts of the supply pipe bracket.
7. Remove the power steering fluid supply hose from the vehicle.
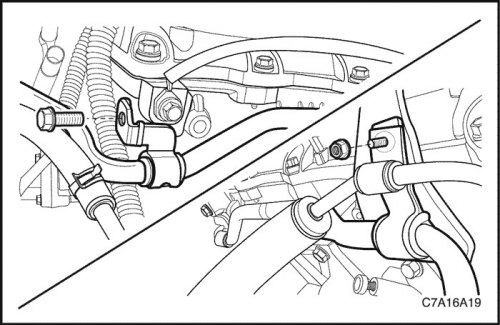
Installation order
1. Install the power steering feed hose.
2. Install the supply pipe bracket mounting bolts.
Tighten
Tighten the supply pipe bracket fixing bolts to 10 Nm (7 lb-ft).
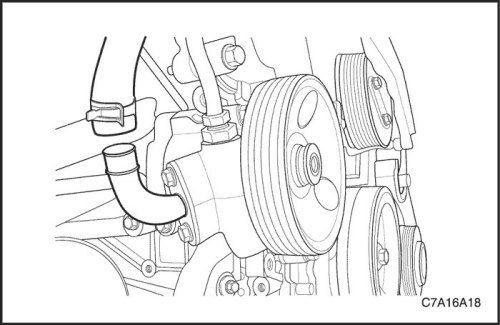
3. Connect the supply hose to the bottom fitting of the fluid reservoir.
4. Install the front wheels. See section 2E, "Tires and wheels".
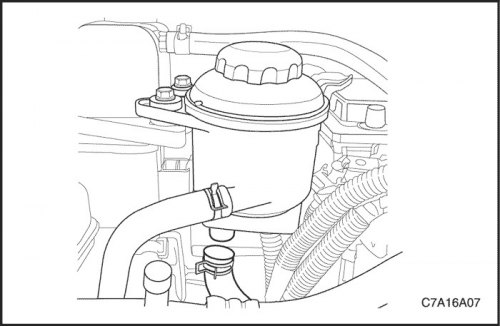
5. Connect the supply hose to the bottom fitting of the fluid reservoir.
Note: Always use DEXRON®-IID Power Steering Fluid for topping up or complete fluid changes. The use of an unsuitable fluid will damage hoses and seals and result in leakage.
6. Install the fluid reservoir with bolts.
Tighten
Tighten the fluid reservoir bolts to 9 Nm (80 lb-in).
7. Fill reservoir with power steering fluid.
8. Make sure there is no leakage. If a leak is found, correct its cause and bleed the system. See «Bleeding the power steering system» in this section.
