Checking the cylinder head
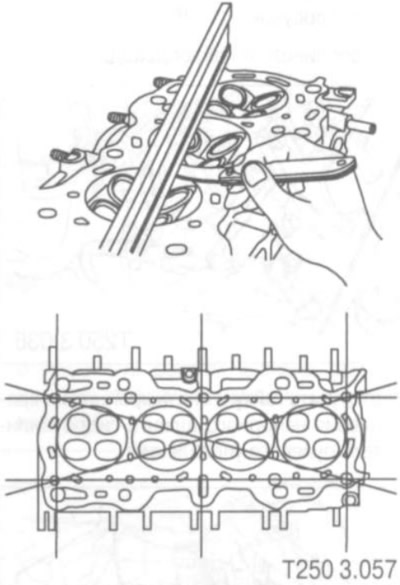
The cylinder head is checked for deformation using a measuring ruler and a feeler gauge in the planes shown in the figure. Control parameters:
- maximum flatness of the surface in contact with the cylinder head gasket: no more than 0.05 mm;

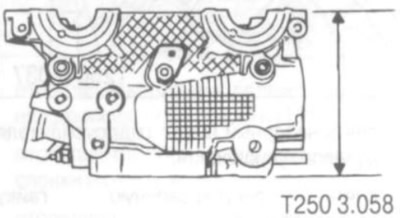
- cylinder head height: 138.13-138.18 mm.

Checking valves and guides
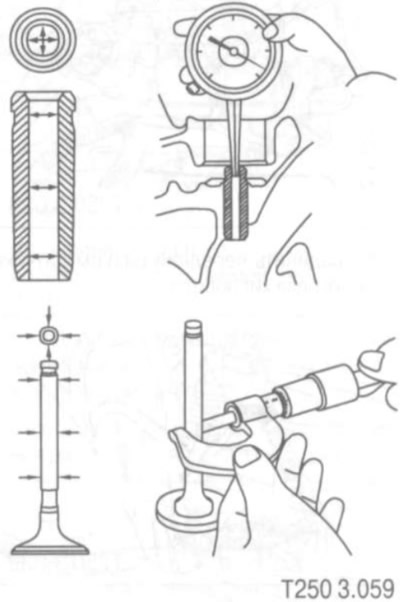
The inner diameter of the guide sleeve and the outer diameter of the valve are measured in three planes along two mutually perpendicular diameters in each plane.

Inlet/Exhaust Valve Guide Inner Diameter: 6.0-6.02mm.
Intake valve stem diameter: 5.955-5.97mm.
Exhaust valve stem diameter: 5.935-5.95mm.
Checking valve seats
Valve seats are checked visually for signs of overheating, mechanical damage and tightness of the valve surface.
The width of the locking surface of the inlet seat: 1.17-1.57 mm.
Width of the closing surface of the outlet seat: 1.4-1.8 mm.
Checking valve springs
When checking, a visual inspection is made for damage and the length of the spring is measured.
The length of the valve spring at a load of 580±29 N: 23 mm.
The length of the valve spring at a load of 260±16 N: 33 mm.
Checking the camshafts
When checking camshafts, the following parameters are measured:
- outer diameter of the neck No. 1 of the camshaft: 29.935-29.95 mm;
- outer diameter of the neck No. 2, 3, 4, 5 of the camshaft: 26.935-26.95 mm:
- plain bearing outer diameter No. 1: 30.0-30.021 mm;
- plain bearing outer diameter No. 2, 3, 4, 5: 27.0-27.021 mm;
- shaft cam lift height: 7.2 mm.
