Withdrawal
1. Disconnect the electrical connector from the tank.
2. For vehicles with a manual transmission, disconnect the clamp connecting the clutch hose to the brake master cylinder.
3. Muffle a hose and openings of the main brake cylinder so that liquid did not flow out.
4. Remove nuts of fastening of the main brake cylinder.
5. Slightly press the main brake cylinder and pull it out of the guide. Do not disconnect brake lines.
6. Remove the amplifier housing seal,
7. Remove the clamp connecting the vacuum hose to the booster (the figure shows the DOHC motor connection).
8. Disconnect the brake lamp switch.
9. Remove the brake pedal spring.
10. Disconnect the clamp and stem stud from the pedal bracket assembly.
11. Remove the nuts securing the amplifier and bracket to the rear panel of the engine compartment.
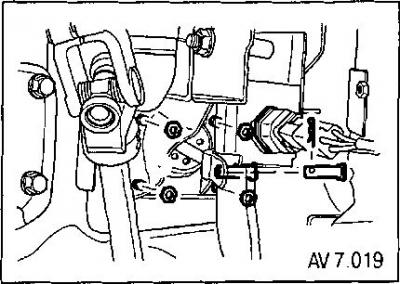
12. Remove the amplifier and bracket.
13. Remove the nuts securing the amplifier to the bracket, and then the amplifier.
14. Remove the rubber cover and retainer.
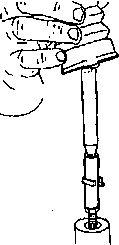
15. Remove stem.
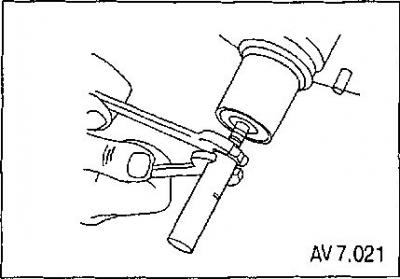
16. Remove the adjusting tube from the stem.
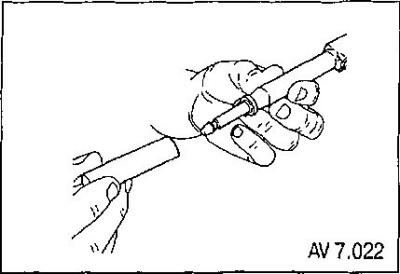
17. Remove the hex nut.
Installation
1. Check stem and adjusting tube for damage and proper fit.
2. Tighten the hex nut of the booster rod and adjusting tube to 18 Nm.
3. Install the stem into the adjusting tube and then the retainer.
4. Measure the distance from the booster to the center of the fork holes.
Attention: this distance must be 278.5 mm.
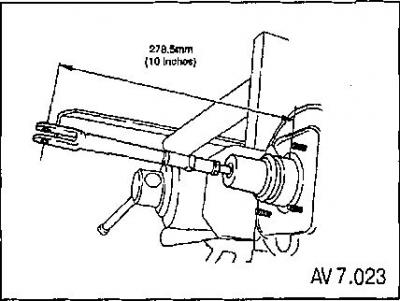
5. Install the rubber boot on the amplifier.
6. Install the brackets on the amplifier and tighten the fastening nuts to a torque of 22 Nm.
7. Install the amplifier and bracket assembly on the rear panel of the engine compartment and tighten the fastening nuts to a torque of 24 Nm.
8. Connect the main brake cylinder to the booster and tighten the fastening nuts to a torque of 24 Nm.
9. Attach a new vacuum hose to the booster (the figure shows the DOHC motor connection)
10. Install new clamps on the vacuum hose.
11. Install stem stud to brake pedal bracket assembly and install clip and spring.
12. Install the lamp switch.
